5031 N Gay Ave, Portland, OR 97217
Silhouette Studio

Advanced Nesting Rules

Strategic spacing, sheet boundary allowances, and rotation controls for dense variable label layouts in Silhouette Studio Business Edition.

Marcus Vance October 6, 2026 7 min read
Advanced Nesting Rules
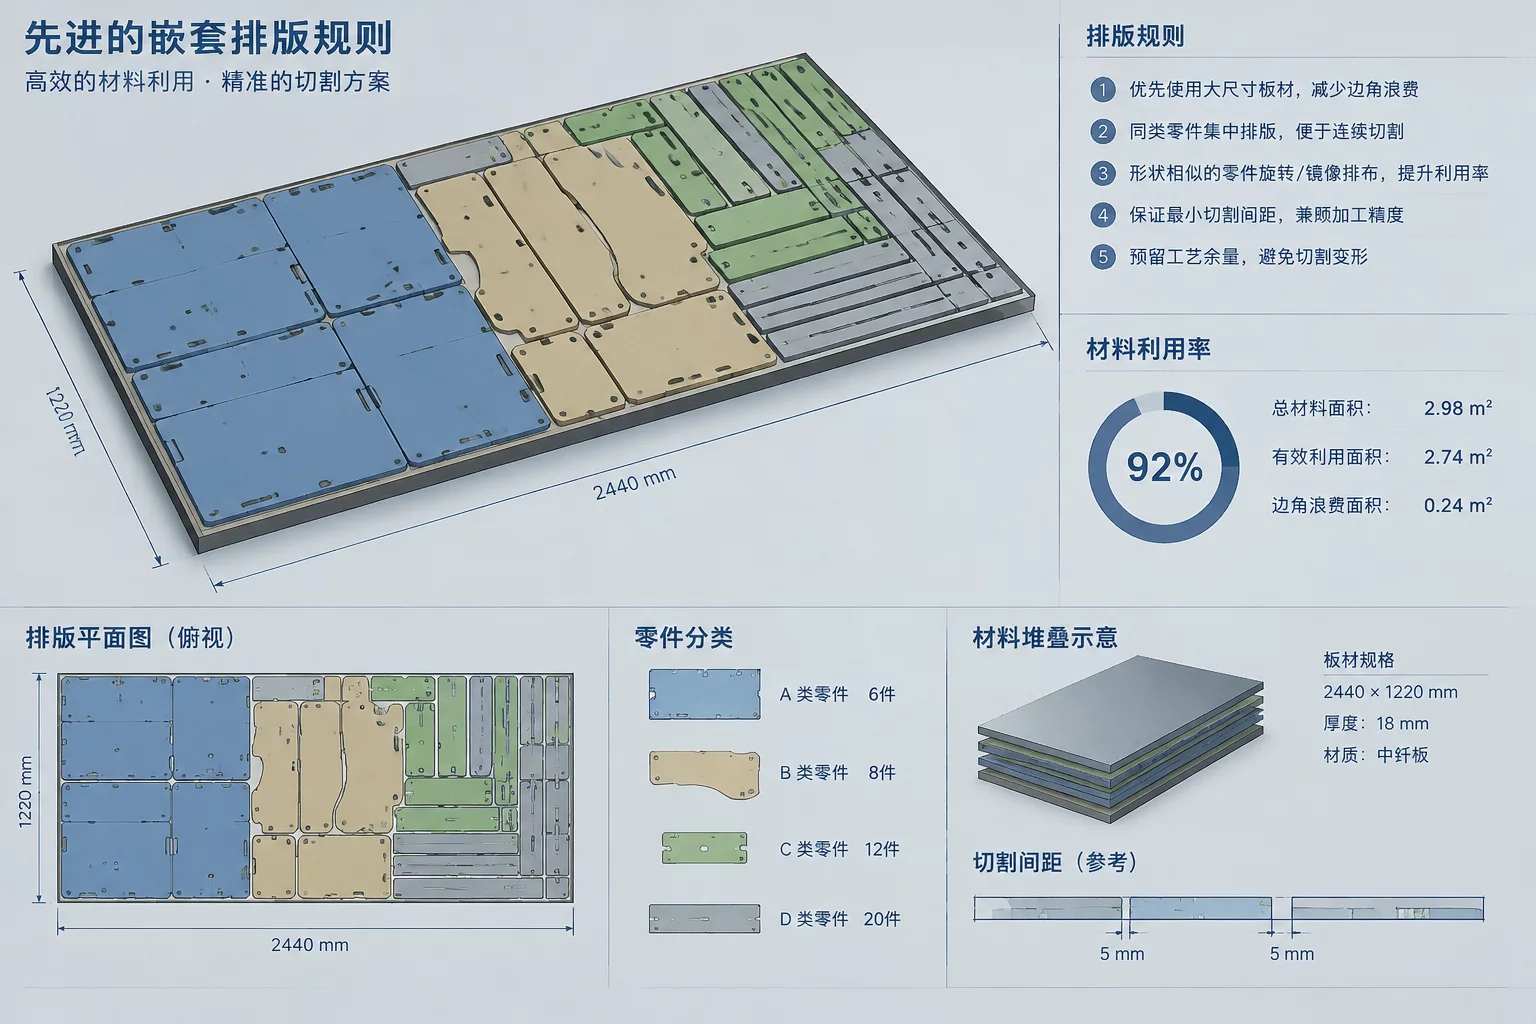
Silhouette Studio automated nesting analysis showing rotation allowances and minimum 2.5 mm contour gutters.
Min Padding 2.5 mm cut boundary margin
Rotation 90° and 180° orientation locks
Material Yield Up to 22% sheet waste reduction

Geometric Nesting Parameters and Bleed Protection

Generating personalized label series across full sheets introduces physical constraints that standard graphic grids cannot solve efficiently. Silhouette Studio Business Edition provides an automated nesting engine, yet raw automation without boundary rules often results in overlapping bleeds, blade collision paths, or sheared registration marks. Establishing rigid border offsets prior to running algorithmic packing ensures that every nameplate retains its required trim tolerance.

The nesting engine evaluates vector perimeters rather than raster bounding boxes. When variable text layers extend past nominal safe margins, uncalibrated nesting routines push adjacent label outlines together, shrinking separation channels below the minimum physical knife tolerance. Controlling rotation intervals and maintaining distinct cut boundaries eliminates sheet misfeeds and uneven adhesive peel lines during post-cut weeding.

Setting Up Automated Packing Safeties

Before triggering the Nesting panel, several perimeter conditions require verification across your variant array:

  • Group graphic fills and interior typography with their corresponding die-cut contours to prevent dissociated nesting elements.
  • Restrict orientation angles to 90-degree or 180-degree increments, protecting paper grain direction and foil reflection patterns.
  • Allocate an absolute minimum padding spacing of 2.5 millimeters to preserve vinyl release stability and avoid matrix tears.

Preserving material margins along sheet edges remains equally critical. Silhouette cutting mats and roll feeders exhibit micro-drift near peripheral boundaries. Keeping items at least 6 millimeters inside registration marks and page edges ensures registration sensor tracking never suffers optical distortion.

Step-by-Step Production Sheet Packing Workflow

Executing dense nesting without compromising individual label aesthetics relies on a disciplined production sequence across the design workspace:

  1. Lock the baseline master template and duplicate the required text variations into compound vector containers across the holding canvas.
  2. Define the target media boundary dimensions in the Page Setup panel, accounting for registration mark inset values and non-printable zones.
  3. Open the Nesting Panel, activate shape interleaving with rotation limits enabled, and execute the alignment solver while inspecting corner proximity.

Following automatic placement, inspect adjacent labels for potential blade drag across tight turns. If any sharp apexes align in near-contact points, manually shift the flagged items by 0.5 millimeters to eliminate knife chatter during continuous cut sequences.

Key Nesting Principles

  • Restrict automated rotation to 90° or 180° increments to prevent directional foil, grain, and textile texture mismatches.
  • Maintain a non-negotiable 2.5 mm inter-label gutter distance to avoid adhesive bleed and torn weeding matrix borders.
  • Always nest compound groups containing paired cutlines and typography, never running packing routines on loose text objects.
Tags: Silhouette Studio Sheet Nesting Material Optimization Business Edition
Marcus Vance
Senior Production Specialist

Marcus Vance

Marcus Vance specializes in high-volume cutter calibration, automated layout algorithms, and die-cut packaging workflows with over a decade of hands-on digital fabrication experience.

Field Q&A

Nesting & Layout Questions

The nesting utility treats ungrouped vector components as autonomous entities. To prevent loose names or decorative lines from scattering across the sheet, group each label perimeter, background artwork, and typographical layer together (Ctrl+G / Cmd+G) before launching the Nesting dialogue.

The native algorithmic nesting module is an exclusive feature of Business Edition. In Designer Edition or the Basic free tier, nesting requires manual duplication and visual tiling across the cutting mat grid.

Keep all label outlines and print graphics at least 5 millimeters clear of the hatched registration crossbars and optical corner blocks. Placing nested graphics into the sensor reading track causes registration scanning errors.

Refine Your Multi-Variant Cutting Workflow

Discover how systematic layer controls and balanced nesting conventions prevent waste across large custom label runs.